• Features
  • Why FreshPay
  • Pricing
    • All Integrations
    • Mimo
    • PensionSync
    • Quickbooks
    • Xero
    • Telleroo
    • Penfold
    • Nest
    • Modulr
    • How To Guides Step-by-step guides to help you get the most out of FreshPay.
    • Migration Service Switch to FreshPay with a smooth, fully supported migration.
    • Support Sessions Join live support sessions for real-time help from our team.
    • YouTube Channel Watch tutorials, updates and tips on our YouTube channel.
    • FAQs Quick answers to common questions about using FreshPay.
    • Contact Support Get in touch with our team for help, questions or account support.
  • Blog
  • Book Demo
  • Free Trial
Book Demo
Free Trial

Companies

9
  • Adding a Subcontractor 
  • Ceasing a Payrun
  • Deleting a Company
  • Deleting a Payrun
  • Director Payruns
  • Finalising/Reopening a Payrun and HMRC Submission Check
  • How to Assign Someone to a Bureau
  • Adding CIS & Sub-contractors
  • Roll Over to New Tax Year

Company Users

4
  • Adding Additional Rates
  • Creating a New Company: User Guide
  • Viewing, Editing and Adding Assigned Employees
  • To assign/unassign someone to a company 

Employees

12
  • Adding a P45
  • Employee Portal 
  • Adding an Employee
  • Adding and Deleting Holidays
  • Adding and Deleting Maternity Leave
  • Adding and Deleting Paternity Leave 
  • Adding and Deleting Sickness 
  • Adding/Deleting Adoption Leave
  • Adding/Deleting Bereavement Leave
  • Student Loans/Postgraduate Loans
  • Uploading an Employee CSV File
  • Carrying Forward a Tax Refund

Employer Portal

1
  • Employer Portal Invitation

Payroll Reports

1
  • Documents and reports

Pension

1
  • Pension Sync

Integrations

2
  • Integrating FreshPay with Telleroo
  • Connecting Freshpay to Xero
View Categories
  • Home
  • How To Guides
  • Companies
  • Company Users
  • Creating a New Company: User Guide

Creating a New Company: User Guide

Once you have logged in you will can add your bureau HMRC ID by clicking on the Edit online filing ID button on your dashboard

You will then need to go to: 

Bureau 1 ≥≥ companies >> add new company ≥≥ 

Shows Companies List
(All categories with a * are mandatory, anything else can be added at a later date).

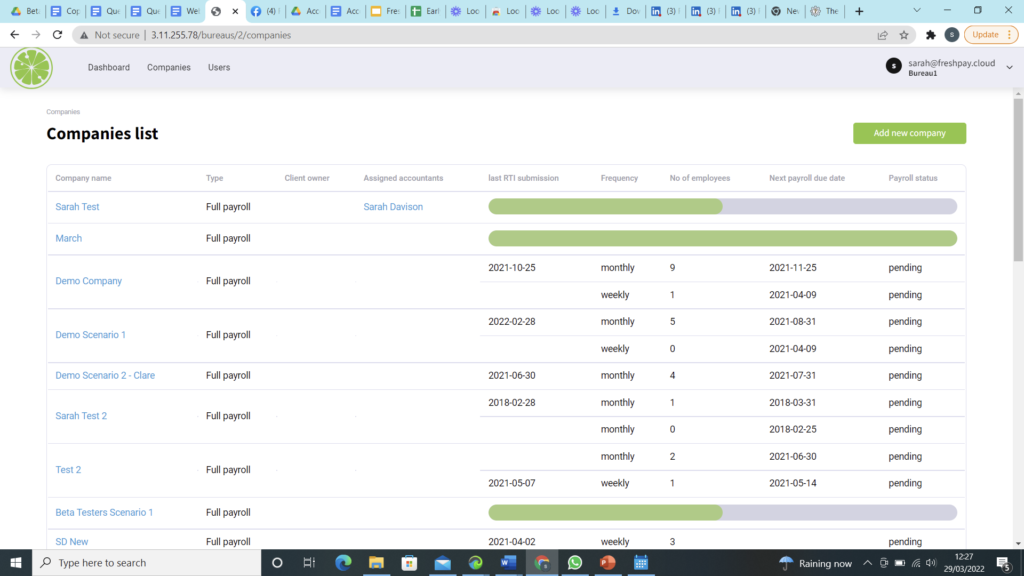
Enter Company name >> number >> select full payroll or Director only >> if the company has CIS tick yestick contractor flow and/or subcontractor flow, enter the UTR number, month ending for the first return >>  you can then select an employee you would like to assign the company to >> trading name >> company type address >> HMRC number (this must be correct or you will not be able to save) >> account office reference (this must be correct or you will be unable to save).

This will then automatically take you to the structure, you can add as many departments as you wish by clicking the add new department

Displays Structure Block

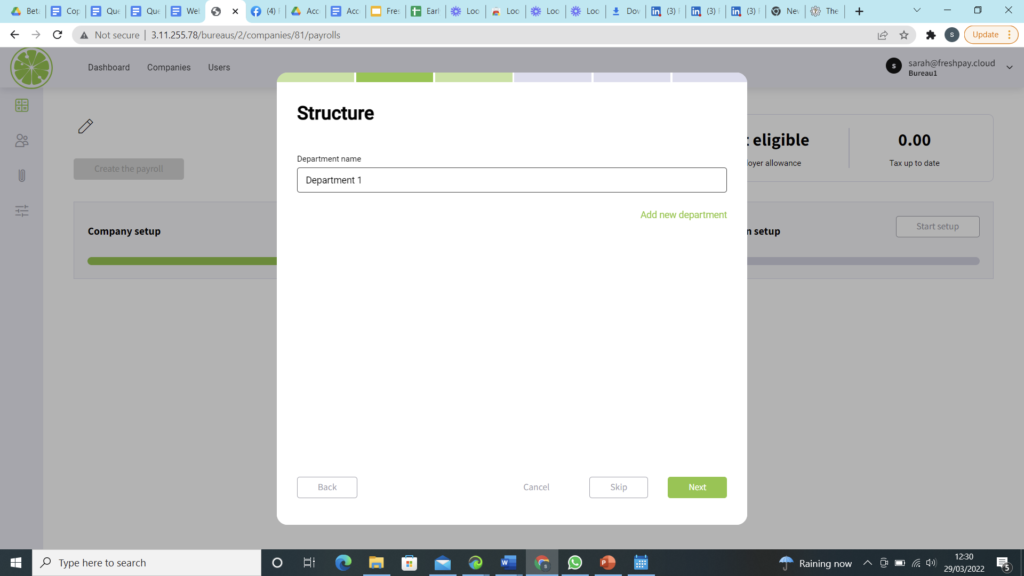
Enter all details >> you can add the employees holiday allowance and any holidays they take will automatically deduct from their allowance >> next 

“Handy hint – you can click back at any point if you wish to change details”

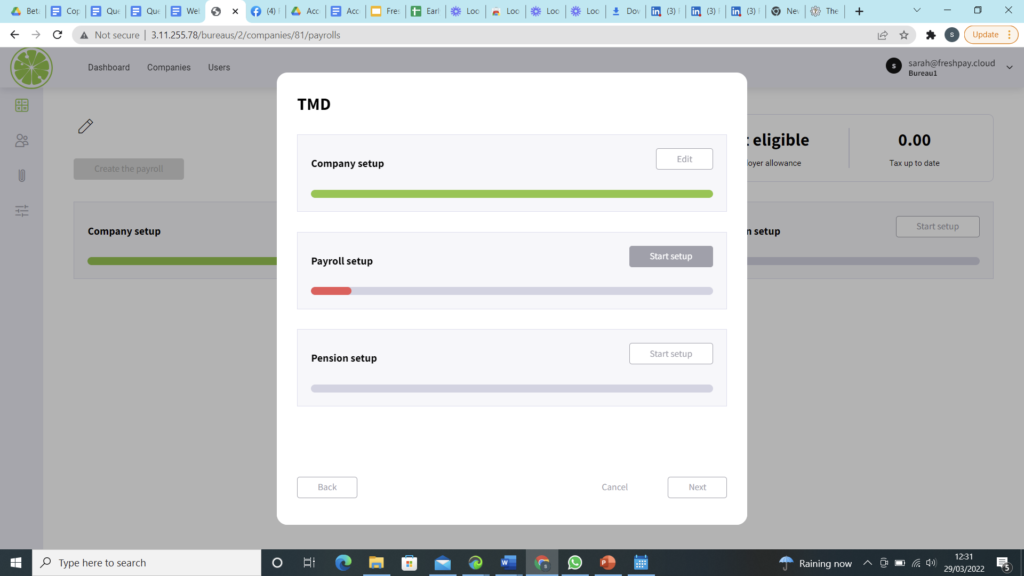
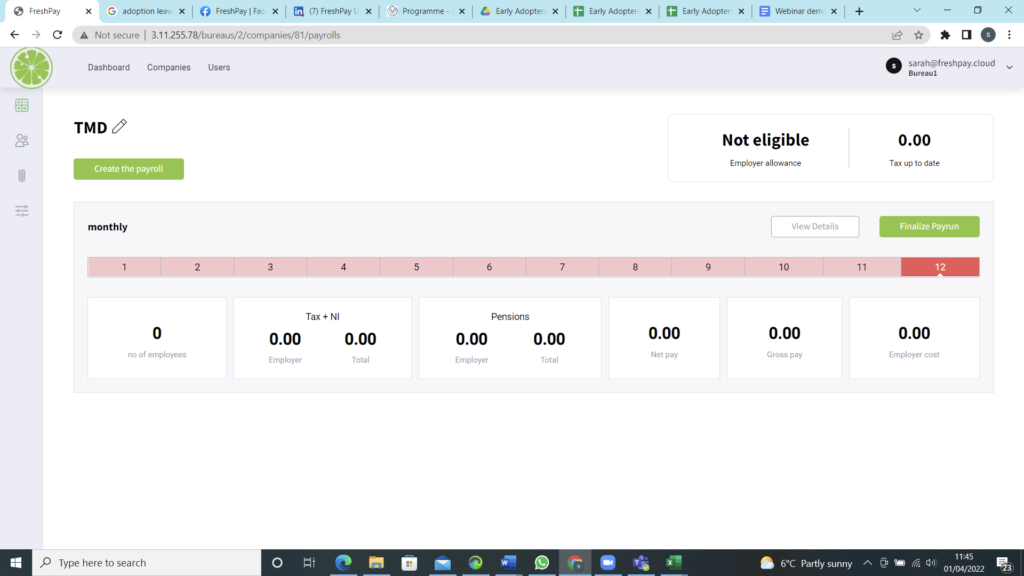
This will take you to the screen below:

shows the TMD dialog
If the initial company set up has a green line (as shown above) that means you are ready to move on to the next stage 

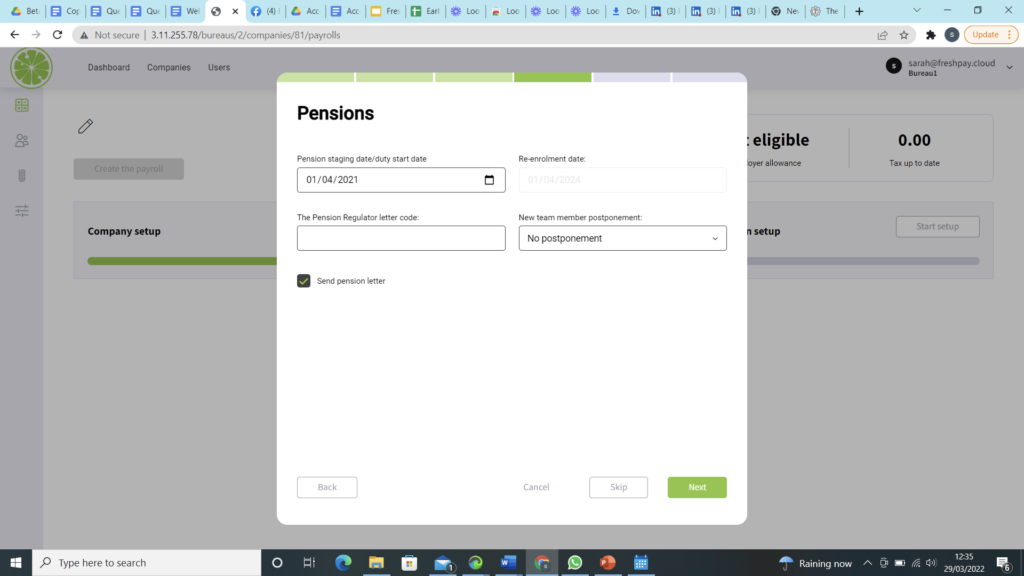
You will need to complete the pension setup next >> complete details >> if you wish to you can postpone by selecting the amount of months required in the drop-box 

Shows Pensions Dialog

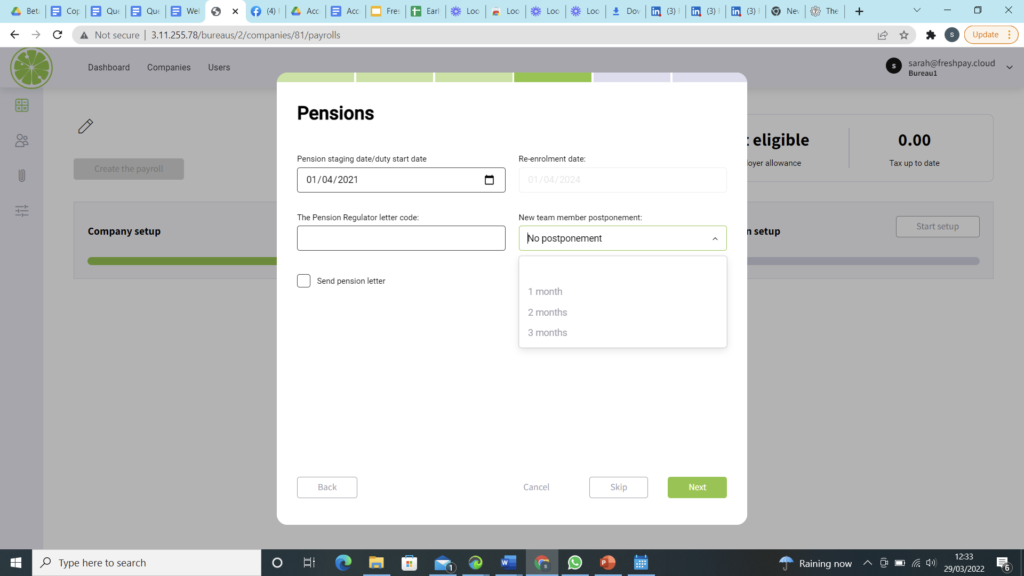
You can also have your pension letters going out automatically by ticking the box as shown below:

Shows Pension Dialog

Once complete click next and you will need to add your pension provider, you can select this from the drop down-box >>  tick the box to auto enrol >> scheme name >> you can connect automatically by ticking the box and entering the company ID or you can add as many pension providers as you like by clicking the add new provider

Shows Pension provider options

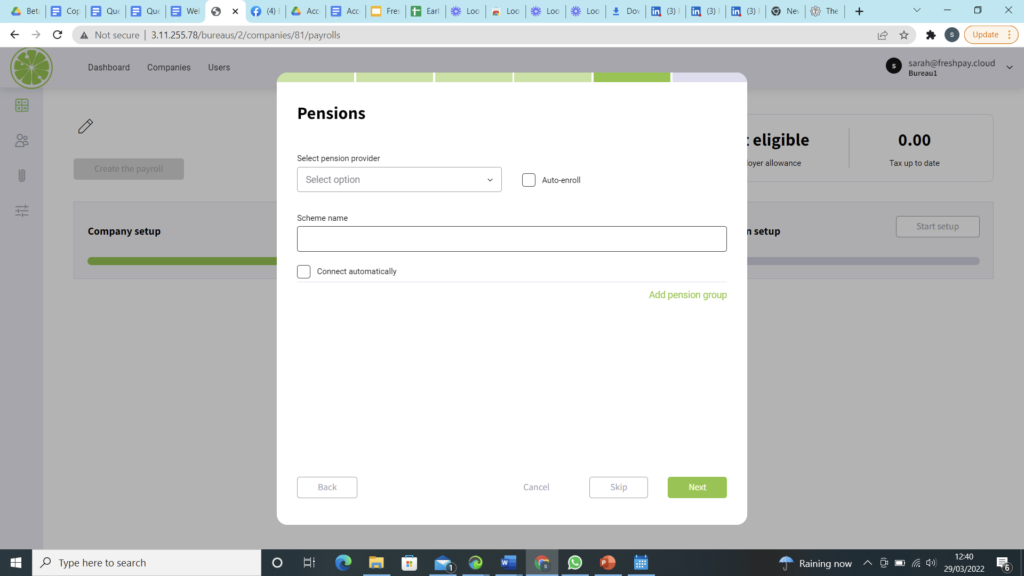
If completed correctly you will now see a green line on your pension setup, as shown below:

Shows Company setup progress line

Payroll Setup #

Select pay frequency and the following page will appear – this must be completed to enable you to continue  

Shows Payroll Setup Box

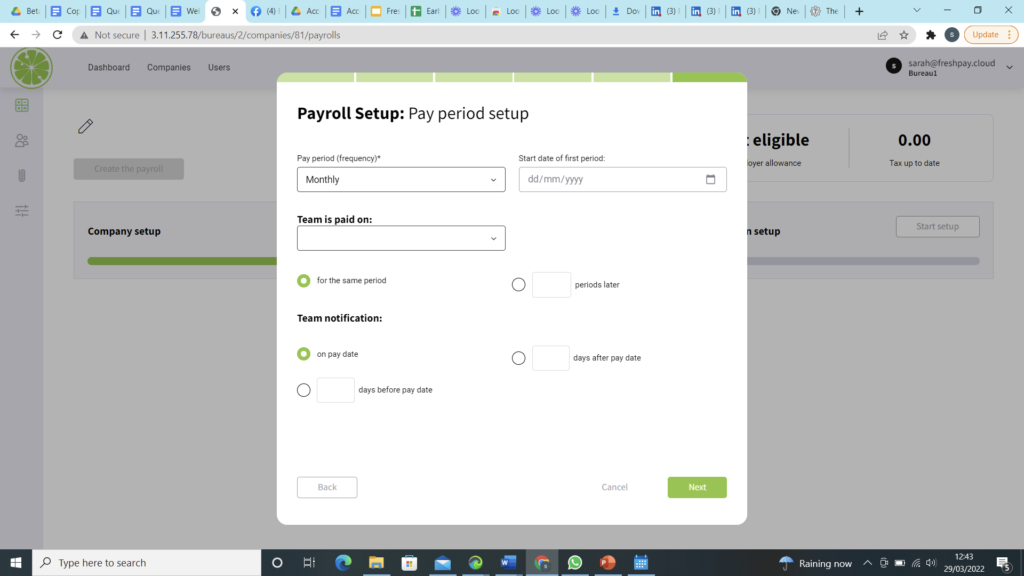
Select the day the team is paid on from the drop-down box:

Shows payrol period drop down box
Select when the team are notified >> click next and a summary for the whole years pay period will appear >> approve

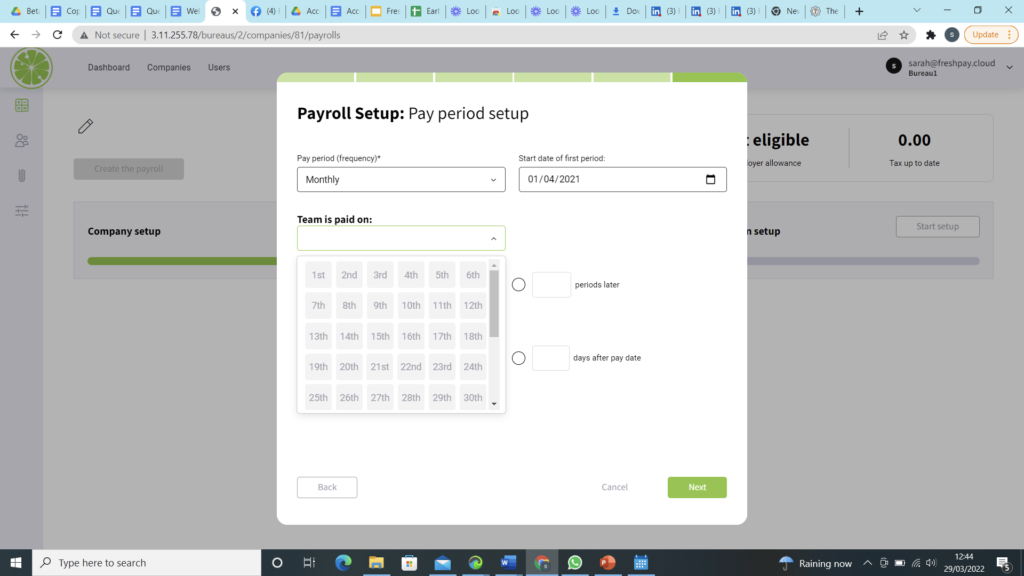
The screen below should then appear and you are ready to add your employees

Add Employee Screen

You can also add users to assign to by clicking the user tab.

Updated on May 3, 2026
Adding Additional RatesViewing, Editing and Adding Assigned Employees
Table of Contents
  • Payroll Setup
FreshPay-Logo-Colour-Light-RGB
Get in touch
Phone +44 (0)1403 599 355
Email

hello@freshpay.cloud
support@freshpay.cloud

Address

2 Pondtail Farm, Coolham Road,
West Grinstead, Horsham,
West Sussex RH13 8LN

Product Features Why FreshPay Integrations Pricing Blog Contact
Support How To Guides Migration Service Support Sessions YouTube Channel FAQS
Join the FreshPay community

Be the first to hear about the latest FreshPay updates and improvements.

© 2026 FreshPay Ltd. All Rights Reserved. Website by Space Five
Privacy Policy Term and Conditions